


Revive Your GTI’s Roar: How to Fix a Debimetre (MAF Sensor) on Your Golf 3 GTI 8v in 5 Minutes
The Golf 3 GTI 8v: a classic for a reason. That distinctive growl, the responsive handling – it’s a driving experience many cherish. But what happens when that growl turns into a sputter, and your GTI feels sluggish? Often, the culprit is the debimetre, also known as the Mass Air Flow (MAF) sensor. This crucial component measures the air entering your engine, allowing the engine control unit (ECU) to deliver the correct amount of fuel. A faulty debimetre can wreak havoc on performance, fuel economy, and even emissions. The good news? Replacing it is often a straightforward, 5-minute job. Let’s get your GTI back to its former glory!
Understanding the Debimetre (MAF Sensor) and Its Symptoms
Before we dive into the fix, let’s understand what the debimetre does and how to identify a problem.
- Function: Measures the mass of air entering the engine.
- Symptoms of a Faulty Debimetre:
- Rough idling or stalling: The engine may struggle to maintain a stable idle speed.
- Loss of power or acceleration: The engine feels sluggish and unresponsive.
- Poor fuel economy: The car may consume more fuel than usual.
- Check Engine Light (CEL) illuminated: The CEL will often illuminate, indicating a problem with the air intake system.
- Black smoke from the exhaust: Indicates a rich fuel mixture.
- Hesitation during acceleration: The engine may hesitate or jerk when you press the accelerator.
Tools and Materials You’ll Need
Fortunately, this is a simple repair, requiring minimal tools:
- New Debimetre (MAF Sensor): Ensure you purchase the correct replacement for your Golf 3 GTI 8v. Refer to your vehicle’s manual or a parts supplier to confirm the correct part number.
- Screwdriver: Typically, a Torx screwdriver (specifically T20 or T25, check your specific model) is needed to remove the sensor’s screws.
- Wrench or Pliers (Optional): May be needed to loosen the hose clamp.
- Gloves (Optional): To keep your hands clean.
Step-by-Step: Replacing the Debimetre
Here’s how to replace the debimetre in your Golf 3 GTI 8v in about 5 minutes:
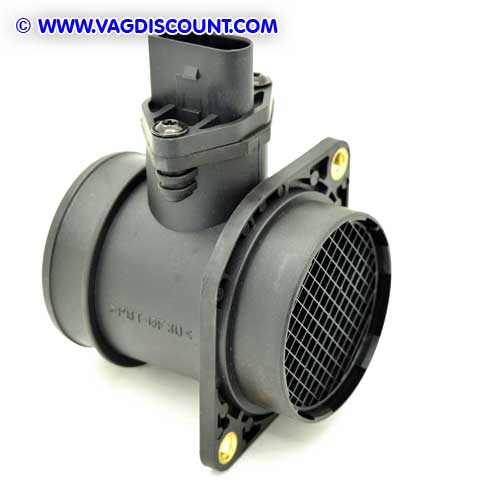
- Locate the Debimetre: The debimetre is typically located in the air intake system, between the air filter housing and the throttle body. It’s usually a black plastic component with a wiring connector attached.
- Disconnect the Wiring Connector: Carefully disconnect the electrical connector from the debimetre. This usually involves pressing a tab or lever.
- Loosen the Hose Clamp (If Applicable): Some Golf 3 GTI 8v models might have a hose clamp securing the debimetre to the intake hose. Use a screwdriver or pliers to loosen the clamp.
- Remove the Screws: Use your screwdriver to remove the screws that secure the debimetre to the air filter housing or intake manifold.
- Remove the Old Debimetre: Gently pull the old debimetre out of the air intake system.
- Install the New Debimetre: Insert the new debimetre into the same location, ensuring it’s properly seated.
- Secure the New Debimetre: Tighten the screws to secure the new debimetre. Don’t overtighten them.
- Reconnect the Wiring Connector: Plug the electrical connector back into the new debimetre, ensuring it clicks securely into place.
- Tighten the Hose Clamp (If Applicable): If you loosened a hose clamp earlier, tighten it now.
- Test the Engine: Start your engine and let it idle for a few minutes. Check for any improvement in performance. Take the car for a short drive to confirm the issue is resolved. The CEL might reset itself or will require a reset with a diagnostic tool.
Troubleshooting Tips
- Double-Check the Part Number: Before installing, ensure you have the correct replacement debimetre for your specific GTI 8v model.
- Clean the Air Filter: While you’re at it, consider cleaning or replacing your air filter. A clean air filter can improve performance and prevent premature debimetre failure.
- Inspect the Wiring: Check the wiring connector for any corrosion or damage.
- Consider a Diagnostic Scan: If the CEL remains illuminated after replacing the debimetre, it’s recommended to have your vehicle scanned with a diagnostic tool to check for other potential issues.
Conclusion: Back to GTI Glory!
Replacing the debimetre on your Golf 3 GTI 8v is a simple and effective way to restore its performance and address common drivability issues. By following these steps, you can quickly diagnose and fix the problem, allowing you to enjoy the spirited driving experience your GTI was designed to deliver. Get back behind the wheel and feel the thrill!
Frequently Asked Questions (FAQs)
1. Will replacing the debimetre always fix the problem?
While a faulty debimetre is a common cause of performance issues, it’s not always the only culprit. Other components, like the oxygen sensor or vacuum leaks, can also contribute to similar symptoms. If the problem persists after replacing the debimetre, further diagnosis may be required.
2. Can I clean the old debimetre instead of replacing it?
While some debimetres can be cleaned, it’s generally not recommended. These sensors are delicate, and cleaning them incorrectly can damage them further. Replacing the sensor is usually the most reliable solution.
3. Where can I buy a replacement debimetre?
You can purchase a replacement debimetre from various sources, including auto parts stores (both brick-and-mortar and online), online retailers specializing in Volkswagen parts, and even some general online marketplaces. Ensure you purchase a reputable brand and verify the part number.
4. Do I need to reset the ECU after replacing the debimetre?
Sometimes, the ECU will reset itself after the new debimetre is installed. However, it’s recommended to disconnect the negative terminal of your car’s battery for a few minutes (10-15) to reset the ECU. Otherwise, you can use a diagnostic tool to clear the fault codes. 5. What happens if I replace the debimetre with a cheaper one?
While a cheaper debimetre might seem appealing, it might not be as accurate or durable as a higher-quality replacement. This could lead to performance issues, reduced fuel economy, and a shorter lifespan for the sensor. It’s generally recommended to invest in a reputable brand for optimal results.
