

The Jira Checklist Template That Will Streamline Your Workflow
Jira, a powerful project management and issue tracking tool, is a cornerstone for teams across various industries. While Jira offers a robust set of features, maximizing its potential requires thoughtful configuration. One of the most effective ways to boost productivity and ensure consistent execution is by leveraging a well-designed Jira checklist template. This article delves into the benefits of using such a template, provides guidance on creating one, and offers insights to help you streamline your workflow.
Why Use a Jira Checklist Template?
A Jira checklist template is essentially a pre-defined list of tasks, steps, or criteria that must be completed for a specific type of issue or project. Instead of recreating the same list repeatedly, you use the template to save time, reduce errors, and ensure consistency. Here’s a closer look at the key benefits:
- Consistency: Ensures all issues of a similar type are handled in the same way, leading to more predictable outcomes and fewer oversights.
- Efficiency: Saves time by eliminating the need to manually create checklists for each individual issue.
- Reduced Errors: Provides a clear roadmap, minimizing the chances of missing crucial steps.
- Improved Collaboration: Facilitates clear communication and understanding among team members about the required tasks.
- Enhanced Accountability: Makes it easier to track progress and identify bottlenecks.
- Onboarding Aid: Useful for new team members to understand the workflow.
Creating Your Own Effective Jira Checklist Template
Building a useful Jira checklist template is a straightforward process. Here’s a step-by-step guide:
Identify Common Issue Types: Determine the recurring types of issues your team handles (e.g., bug reports, feature requests, onboarding tasks, marketing campaigns).
Define the Workflow: Map out the typical steps involved in handling each issue type. Consider the following:
- Pre-requisites: What needs to be completed before the issue can be worked on?
- Tasks: List the specific actions required. Be detailed and actionable.
- Assignees: Specify who is responsible for each task.
- Dependencies: Note any tasks that depend on the completion of others.
- Verification: Include steps for testing and validation.
- Approvals: List any required approvals.
- Documentation: Include links to relevant documentation or resources.
Choose Your Checklist Method: Jira offers several ways to implement checklists:
- Built-in Checklist Field (Requires Jira Cloud): Use the built-in checklist field type in Jira Cloud. This is the most straightforward and native method.
- Text-Based Checklist in Description or Comments: Create a checklist directly within the issue description or as comments, using bullet points or numbering.
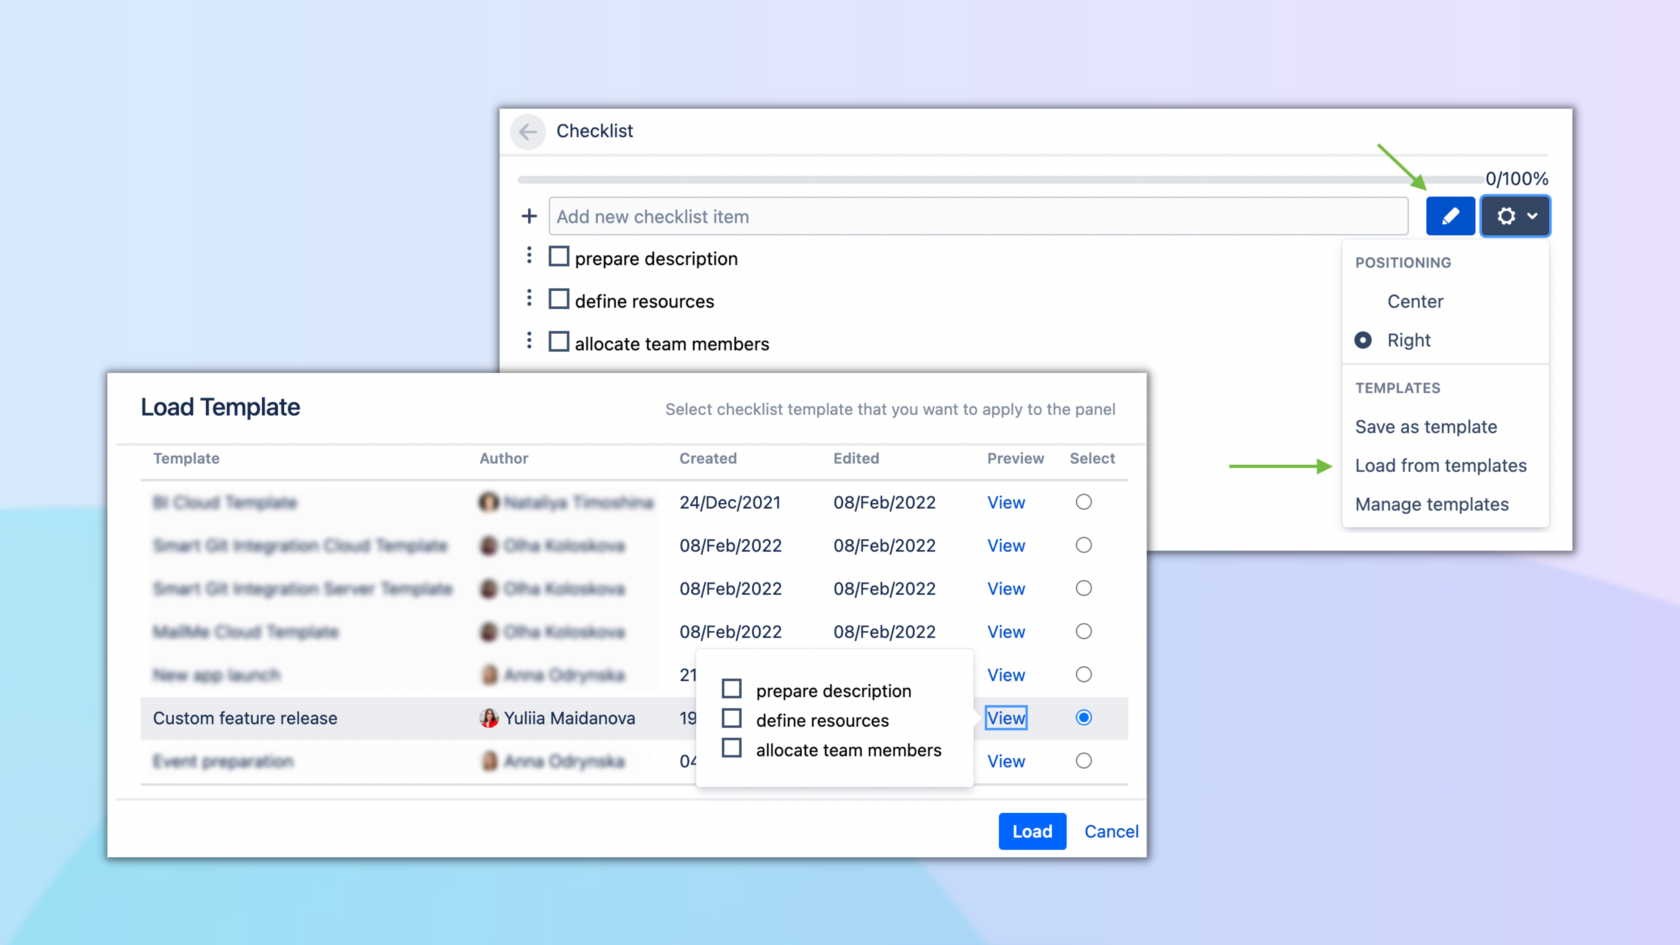
- Third-Party Apps: Explore add-ons from the Atlassian Marketplace specifically designed for checklists. These often provide advanced features like task dependencies, progress bars, and automated actions.
Create the Template:
- For Text-Based Checklists: Simply write the checklist in your desired format within the issue description or comments.
- For the Built-in Checklist Field: Create a custom field of the “checklist” type. Populate this field with your predefined tasks. You can then copy and paste this field across multiple issues.
- For Third-Party Apps: Follow the app’s specific instructions for creating and using checklist templates.
Test and Refine: Before widespread use, test your template with a sample issue. Review the checklist to ensure it’s clear, comprehensive, and easy to follow. Make adjustments as needed.
Document and Share: Document the purpose of the checklist template and how to use it. Share the template with your team and provide training if necessary.
Best Practices for Jira Checklist Templates
To maximize the effectiveness of your Jira checklist templates, consider these best practices:
- Keep it Concise: Avoid overly long or complex checklists. Break down large tasks into smaller, more manageable steps.
- Use Clear and Actionable Language: Each checklist item should be a specific, actionable step.
- Assign Responsibility: Clearly assign ownership for each task to ensure accountability.
- Regularly Review and Update: Review your templates periodically to ensure they remain relevant and effective. Adapt them to reflect changes in your workflow.
- Automate Where Possible: Explore automation options (e.g., with Jira automation rules or third-party apps) to automatically assign tasks, update statuses, or send notifications based on checklist completion.
- Consider Conditional Logic: If using third-party apps, explore conditional logic to show/hide checklist items based on other fields.
Conclusion
Implementing a well-designed Jira checklist template is a powerful strategy for streamlining your workflow, improving consistency, and boosting team productivity. By following the steps outlined in this article, you can create templates that save time, reduce errors, and foster better collaboration. Embrace the power of checklists in Jira to unlock your team’s full potential and achieve project success with greater efficiency.
Frequently Asked Questions (FAQs)
1. How do I create a checklist in Jira Cloud?
In Jira Cloud, you can use the built-in checklist custom field type. Go to the project settings, create a custom field, select “Checklist” as the field type, and then populate the field with the checklist items.
2. Can I use a checklist in Jira Server or Data Center?
While Jira Server and Data Center don’t have a native checklist field, you can use text-based checklists in the issue description or comments, or leverage third-party add-ons from the Atlassian Marketplace.
3. How do I apply a checklist template to multiple issues?
If you’re using the built-in checklist field, you can copy and paste the contents of the checklist field from one issue to another. Third-party apps often offer more advanced features for applying templates to multiple issues.
4. What if my workflow changes?
Regularly review and update your checklist templates to ensure they remain aligned with your current workflow. Adapt them to reflect changes in your processes, team structure, or project requirements.
5. Are there any free Jira checklist add-ons?
Yes, the Atlassian Marketplace offers several free Jira checklist add-ons with varying features and functionalities. Explore the marketplace to find one that meets your needs.
