


The Printable Breaker Box Labels That Will Organize Your Life
Are you tired of fumbling in the dark when a circuit breaker trips? Do you spend precious minutes (or even worse, hours) flipping switches, trying to restore power to a specific appliance or room? You’re not alone. A disorganized breaker box is a common household headache, but thankfully, there’s a simple, affordable, and effective solution: printable breaker box labels.
This article will delve into the benefits of using printable breaker box labels and guide you through the process of creating and implementing them, transforming your electrical panel from a source of frustration to a model of efficiency.
Why Use Printable Breaker Box Labels? The Benefits Explained
Investing a little time in labeling your breaker box can yield significant benefits, saving you time, reducing stress, and even enhancing safety. Here’s a breakdown of the key advantages:
- Instant Identification: Quickly pinpoint the circuit controlling the specific appliance, room, or outlet experiencing an issue. No more guessing games!
- Time Savings: Eliminate the frustrating process of trial and error when a breaker trips, allowing you to restore power faster.
- Improved Safety: Minimize the risk of accidentally turning off the wrong circuit, which could lead to dangerous situations (e.g., shutting off a medical device).
- Easy Customization: Printable labels allow you to tailor the descriptions to your specific electrical setup and needs.
- Cost-Effective: Printable labels are a budget-friendly solution compared to hiring an electrician to label your panel.
- Enhanced Organization: A well-labeled breaker box contributes to a more organized and functional home.
- Increased Home Value: A well-maintained and clearly labeled electrical panel is a positive feature that can appeal to potential buyers.
Creating Your Printable Breaker Box Labels: A Step-by-Step Guide
Ready to take the plunge and organize your electrical panel? Here’s how to create and implement your own printable breaker box labels:
Gather Your Supplies:
- A computer and printer
- Label paper (adhesive or non-adhesive) – Avery labels are a popular and reliable option. Consider waterproof labels for added durability.
- A pen or pencil (for initial labeling)
- A flashlight (for working inside the breaker box)
- Scissors or a craft knife
- A small ruler or measuring tape (optional, for accurate label sizing)
- A label maker (optional, for generating labels)
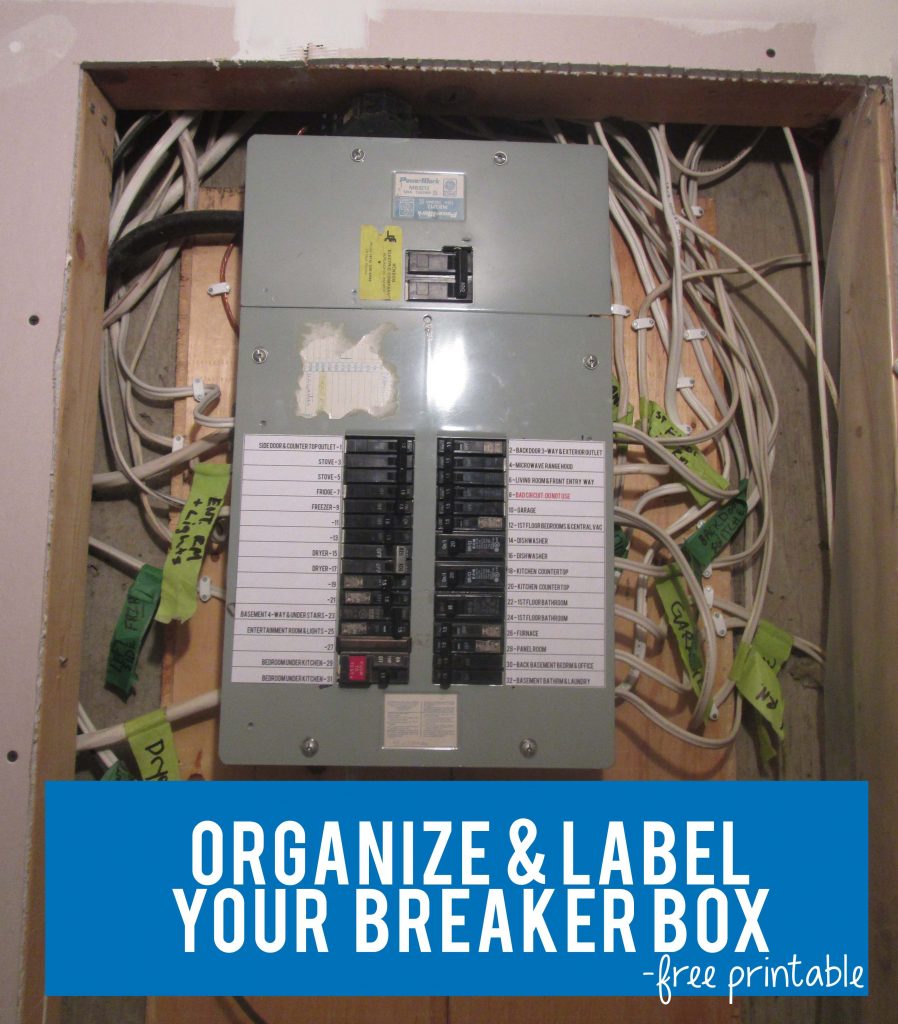
Identify and Map Your Circuits:
- Safety First! Turn off the main breaker to cut power to the entire panel before you start.
- Use a flashlight to examine your breaker box.
- Methodically test each circuit: Plug a lamp or appliance into an outlet and flip each breaker one by one. Note which outlet/appliance goes out when each breaker is flipped.
- Create a circuit map: Write down the function of each breaker (e.g., “Living Room Outlets,” “Kitchen Lights,” “Refrigerator”).
Design Your Labels:
- Choose a template: Many free label templates are available online (e.g., from Avery, Canva, or other office supply websites).
- Consider Label Size: Choose a size that fits comfortably within the space available in your breaker box.
- Use Clear and Concise Language: Keep the descriptions short, simple, and easy to understand.
- Include Room and Appliance Names: Be specific (e.g., “Bedroom Lights,” “Microwave”).
- Add Circuit Number: Include the circuit number next to the description for easy reference.
- Use a Readable Font: Select a font that is easy to read, even in low-light conditions.
Print and Apply Your Labels:
- Print Your Labels: Print your labels onto your chosen label paper.
- Cut Out the Labels: Carefully cut out each label, ensuring it is the correct size.
- Apply the Labels: Adhere the labels to the inside of your breaker box, next to the corresponding breakers. If using non-adhesive labels, consider laminating them or using a clear adhesive tape to secure them.
- Double-Check Accuracy: Before restoring power, double-check that each label accurately corresponds to the correct circuit.
- Restore Power: Turn the main breaker back on.
Labeling Tips and Best Practices
- Update Regularly: As you make changes to your electrical system (e.g., adding outlets or appliances), update your labels accordingly.
- Use Consistent Formatting: Maintain a consistent font, size, and layout for all your labels.
- Consider Color-Coding: Use different colored labels to categorize circuits (e.g., red for high-voltage circuits, blue for kitchen circuits).
- Laminate for Durability: If you’re using non-adhesive labels, laminate them to protect them from wear and tear.
- Keep a Backup: Create a digital copy of your labeled circuit map for easy reference and future updates.
Conclusion: A More Organized and Safer Home
Printable breaker box labels are a simple yet powerful tool for improving the organization, safety, and functionality of your home. By taking the time to identify your circuits and create clear, concise labels, you can eliminate the frustration of a disorganized breaker box and enjoy the peace of mind that comes with a well-maintained electrical system. Start today and experience the difference!
Frequently Asked Questions (FAQs)
1. What kind of label paper should I use?
Choose label paper that is suitable for your printer (inkjet or laser). Adhesive labels are the easiest to apply, but you can also use non-adhesive labels and secure them with tape or a label holder. Consider waterproof labels for added durability, especially if your breaker box is in a damp environment.
2. What if I don’t know what a circuit controls?
If you’re unsure what a circuit controls, use the process described in Step 2 of the guide: Identify and Map Your Circuits. Plug a lamp or appliance into an outlet and flip each breaker one by one to determine which outlets and appliances are affected by each circuit.
3. Can I hire an electrician to label my breaker box?
Yes, you can. Hiring an electrician is a good option if you’re uncomfortable working with electricity or if you have a complex electrical system. However, it will be more expensive than creating your own printable labels.
4. How often should I update my breaker box labels?
Update your labels whenever you make changes to your electrical system, such as adding new outlets, installing new appliances, or re-wiring a room. It’s also a good idea to review your labels periodically to ensure they are still accurate and easy to read.
5. Can I use a label maker instead of printing labels?
Yes, a label maker is a perfectly acceptable alternative. Some label makers allow you to create labels with pre-set formats and symbols specifically for electrical panels. Just ensure the labels are durable and easy to read.
